Goal 1: escape from the infected
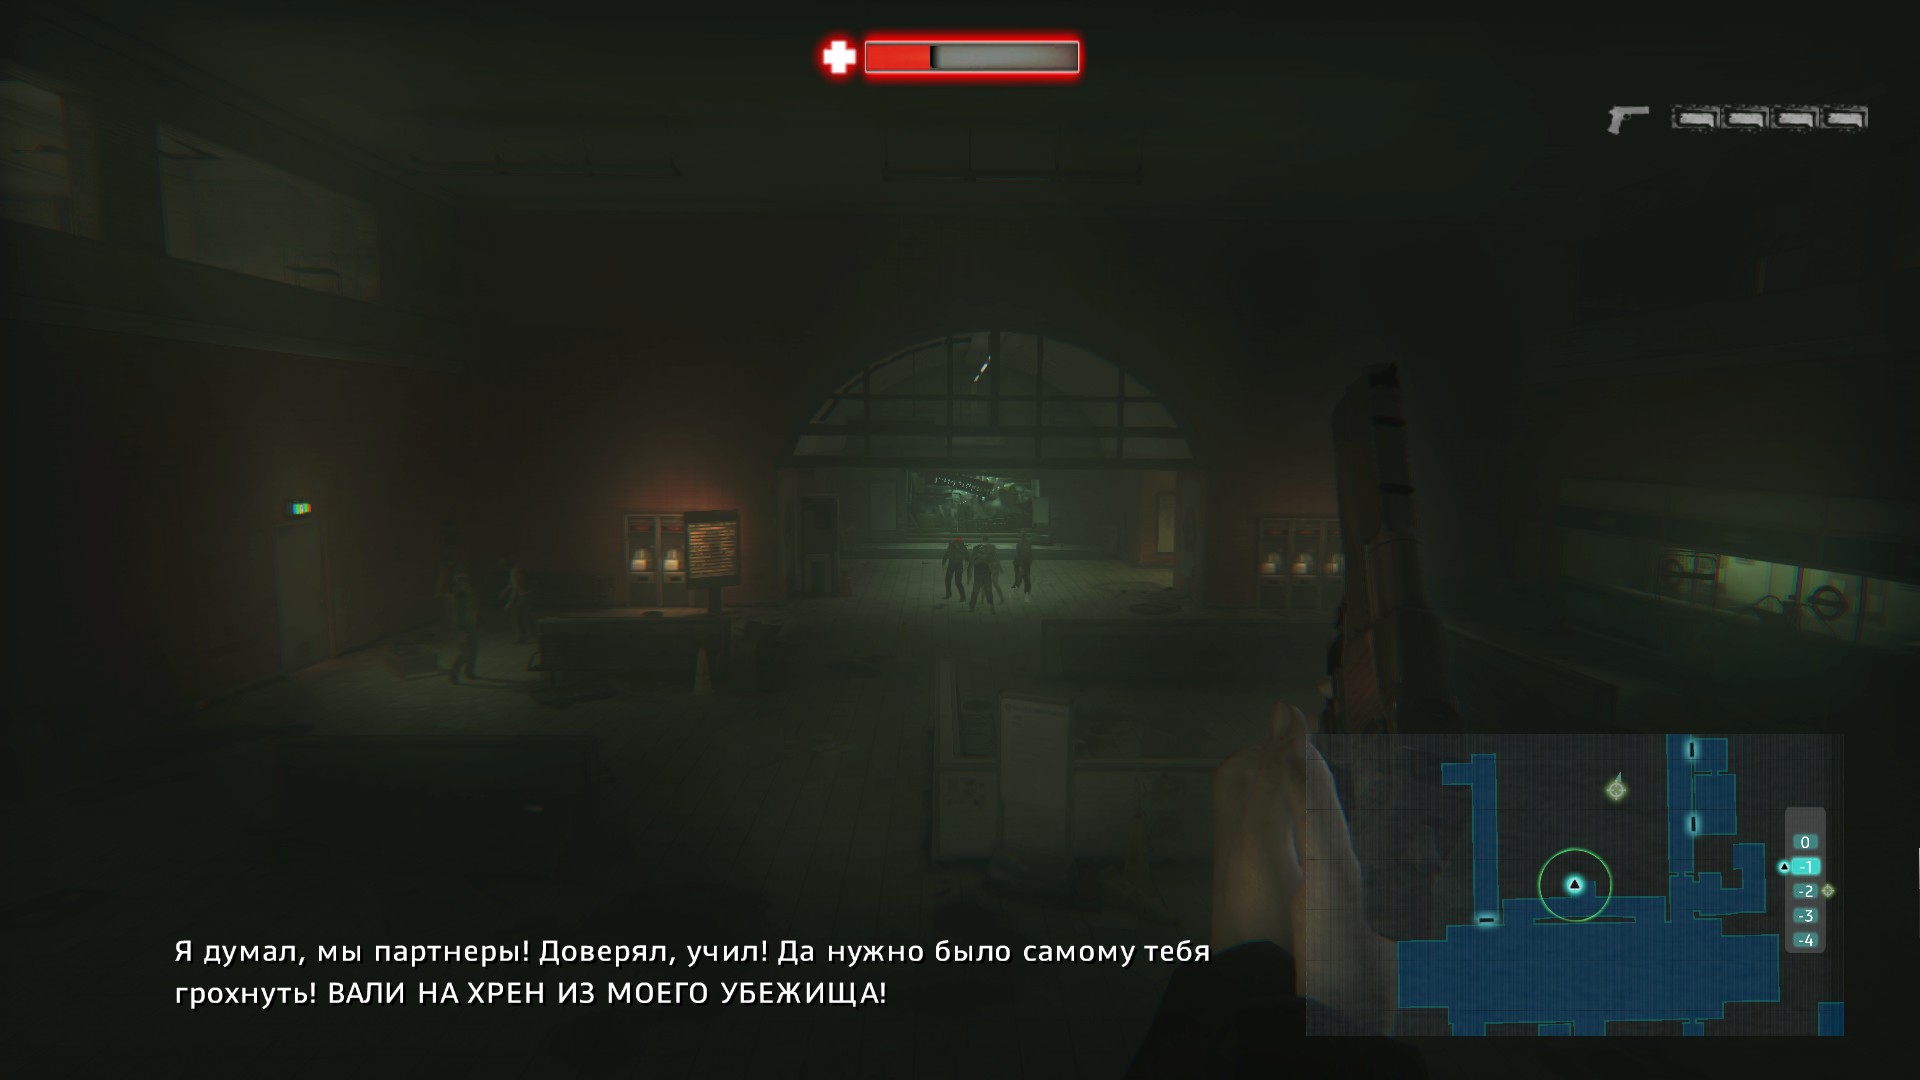
You start at a metro station. Immediately run through the tunnel from the zombies, because they will immediately chase you. Listen and follow the instructions of the mystical voice. Go up the stairs [E]. You can exhale and look around. Zombies won't get you now.


Jump into the ventilation. As you leave the room, you will be instructed to use the flashlight [F] in dark rooms and how to fight off the infected [LMB], but don't try this now. Quickly head down the escalator and run through the door to complete the mission.
Get ready
This mission starts in a hideout. That voice again. He introduced himself as Alive. A story will follow about how he managed to escape the epidemic and is still surviving.
Take the life tablet from the workbench. Now you have a radar and a walkie-talkie. It shows all the important markers, including zombies.

The next stage is to turn on the light in the room; to do this, go to the toilet and start the generator. There is light, you can look around. Go back and look at the monitors. The living one will explain what happened to his last survivor, who did not take the tablet with him on the outing. The previous survivor fell into a trap. Go out and don't forget to turn on the flashlight. Use radar [T] to find the survivor. It is marked with a red dot. Take the bat next to the zombie and finish it off. Now the necessary thing for survival is MOR - a survivor’s backpack, you can store everything you need there. Prepare: distribute everything in your equipment, put the necessary things for quick access.

Return to the main hall and look at the monitors. Our task is to get to the market nearby and scan the distribution blocks of the cameras.
Scan the 2 camera distribution blocks in the supermarket area
Approach the monitors, and Living will explain that there are cameras all over London, so you can have eyes everywhere, at any point. He will also say that one camera at Brick Lane Market is broken.
Objective 2: Get to Brick Lane Market
Using the marker on the map, leave the shelter. The living one will open the passage through the gate.


Goal 3: find a name pass
Once you reach the marker, the door will be closed. Use the radar to find the pass. Turn around and go through the door opposite. Climb through the window and kill the zombies. Find the pass in the box in the next room.
Objective 4: Get to Brick Lane Market, continued
Return to the door and use the card to open it. Go down the corridor. Before reaching the end, turn left into the room. Go through it and go down the stairs. You can find the mod there. "Increasing rate of fire." Go to the door marked "Exit".


Crawl through fallen cabinets. Scan the door with the tablet [C], and then it will be opened for you. Come to the surface.
Objective 5: Scan the first CCTV distribution block
Go straight. There will be a group of zombies on the left, but they won't move in your direction, so feel free to walk past them. There will be a block near the stairs at the corner of the building. Scan it to open a map of the area. Go up the stairs, there you will find flash grenades. Enter the open room. The passage further in it will be blocked, climb through the window, go down.


Stage 6: Open a shortcut to the shelter
Go through the gate and enter the door with the house depicted on it. When you see the hatch, open it by quickly pressing [E]. A quick transition to this zone is now available. You can also find a first aid kit and a newspaper here.
Stage 7: get to the supermarket
Prepare a weapon for the infected behind the next door. Kill him and move on. Go up the stairs. You can find some more flash grenades at the top. Inspect the area and mark all infected using the scanner. Kill them or sneak near the wall. Walk along the fallen fence. Walk towards the building and approach the locked door. After you try to open it, the alarm will sound. The living one will open the door, get ready to repel the zombies behind it. After this, quickly crawl inside, because... the noise attracts the infected.
Objective 8: Scan the second CCTV distribution unit
Enter the refrigerator with the carcasses. Use the radar, don't forget. There will be one infected person there.

Goal 9: Take the hammer
In the next room there will be a boarded up door; you need to find a hammer to break the boards. It lies in a box in the corner of the room.
Objective 10: Scan CCTV Camera 2, continued
Approach the door and press [Q] to break down the barrier. Look around the trading floor, then enter the office. Be careful, there will be about 3-4 infected in the hall, some will become active when you get close to them. Go down the stairs in the office. Find the distribution block and scan it. Go back upstairs. There will be an infected person on the stairs. Get out of the supermarket through the locked door. Remove the board to open the door.

Goal 11: return to the shelter
When leaving the supermarket, zombies will become active and begin to attack. Run to the fast travel point to the shelter. Push them on your way and don’t hesitate to use weapons in extreme situations.
Protect your shelter
Goal 1: familiarize yourself with the task
The live one will explain the purpose of the large blue box to the left of the monitors. This is a warehouse for everything you find in the game world. Put all the necessary things there, especially when you go on an outing, so that your backpack is always free for useful things. Approach the monitors and view the approaching horde from the cameras.


Goal 2: kill all infected
Leave the shelter room and find a safe place to repel the attacks of the infected. It is best to have your back covered to avoid surprise attacks from behind. The enemy will advance slowly. Just two waves. Once you kill everyone, the mission will end. Now you can go rest before the next task. Health is restored during sleep. Therefore, you should not spend first aid kits and food supplies on restoring health in the shelter.
Get to the entrance to the Royal Bunker
Goal 1: familiarize yourself with the task
The living one will explain that the next task worth completing is to infiltrate Buckingham Palace. Go to the monitors and read the task in more detail.
Goal 2: take a personal pass
Return to where you took the backpack with the zombies. Open the door and find the pass among the debris.


Goal 3: get to the gates of Buckingham Palace
Follow the marker. Leave the shelter and approach the turret. Shoot the zombies below to pass by unhindered. Then go down the stairs and go left. Use the card to open the door. Climb through the hole in the brick wall. Enter the train car and go left to the next exit with an opening in the wall. Get out and go down the stairs, then down one metal staircase. You will see another break in the wall. Go there and find the exit door to Victoria Memorial.


Go through the opening, go up the stairs and through the door. Turn right and go through the lattice door. Here is the first infected person on the way. After going down the stairs, immediately turn left to avoid being attacked by zombies. Near the water, crawl into the opening and kill the lying zombie. Go up the stairs nearby. At the top, turn left at the first fork and you will find a door with a room to fast travel to the hideout. Climb the stairs higher and go outside.
Go to the container with the door. Kill the infected, remove the barrier from the door and enter. On the table, take the carbine and cartridges for it. Near the door, scan the switchboard. A map of the area will open. A couple of dead people will burst into the door, which you will have to get rid of. Always keep your weapon in your quick access slot.
Objective 4: get to the sewer entrance
Head towards the guard's body to finish him off. By searching the box nearby, you can find cartridges for a carbine and a pistol. In the container from which the zombie guardsman will run out you will find a mod. "Increasing firepower." Move towards the ambulances. Behind her will be a locked entrance to the sewer.


Goal 5: find the master key
Go to the burning helicopter. The living one notices an upside-down flag on the roof. This is a distress signal. Turn right behind the machine gun and go there. At the end of the container, an Armored Guard will come out from above. Shoot him in the helmet, and then in the head when the helmet falls. If you're out of ammo, you can push him on the way to the turret and shoot him with it. In the chest you will find master keys, grenades, machine gun cartridges, and a shovel.


Objective 6: hack the sewer entrance
After taking the equipment, the horde will attack. Approach the machine gun and say goodbye to her. Shoot at the barrels when there is a large concentration of zombies near them. You don’t have to shoot back at the horde, but just try to run past it. However, you will have to somehow open the lock and get into the collector. Return to the sewer behind the ambulance and select the lock on it. Hacking occurs in the following way. Hold [LMB] and move the mouse to the side. When the pick starts to shake, stop and the lock will open.
Objective 7: Reach the entrance to the royal bunker
There will be a zombie just around the corner after going down. Follow the sewer until you enter a heavy metal door. Slip into the fence and go down. You will soon enter the bunker.
Rob the Royal Bunker

Goal 1: Enter the Buckingham Palace dungeon and rob them
Go downstairs and go out the door. Get to the locked door. Scan it so that the Living One can open it for you. Down below, the Living One will lose our signal and will have to act without his support. Go down the stairs and go through the door on the right side. There you will hear the voice of the surviving doctor - Peter Knight.
Meet the Royal Doctor
Goal 1: get to the doctor
In the hall with the red floor, take the left door. Go along the corridors. There will be several paths, but all lead to the laboratory.
Goal 2: get deeper into the palace
Go to the hall with the red carpet, where you have already been and go into the elevator.

Goal 3: get "De Rimedi Secreti"
After exiting the elevator, turn left into the room. There is a secret passage to the second floor. Climb into the vent to crawl through. An infected person will attack you, quickly fight him off before he bites you. On the second floor there will be a new type of infected - Spitter, which releases acid from a long distance, which temporarily impairs vision and causes damage.. The zombie itself emits smoke. Continue along the corridors of the palace. Climb over the obstacle. Soon a bunch of zombies will attack you, run away from them. You will find yourself in a burning room. Before it there will be a secret door in the wall with a code. The code is 4524. Unfortunately, there will be nothing there.


Find a ladder in the burning room and go up. She will be on the left. Once you reach the end, wait for the zombie to attack you. You can find crossbow bolts on the scaffolding. They will come in handy later. Go around the fire through the forests and follow further. In a narrow corridor you will find a bunch of zombies, kill them or run quickly past them. You will exit through two doors. It doesn’t matter which one you go into, they lead to the same room. In the rich office you will find a book. A passage in the closet will open. There are two paths in the passage, left and right. If you go to the right you will find a backpack that will add two slots to your inventory, be careful there will be a zombie there. After you pick up your backpack, go back. Along the way you will find a hunting crossbow. That's where the bolts came in handy.
Goal 4: give "De Rimedi Secreti" to the doctor
Return to the doctor the same way. If you didn't kill any enemies when you first came here, be careful, because they may overtake you now. Especially beware of the Spitter described above.
Goal 5: Upgrade your survival kit and get a syringe
The Doctor will tell you about Virucide. Virucide can be used to take down a zombie if it tries to bite you, but it can only be used once. To be reused, it must be refilled again from another zombie with the iron. Upgrading the tablet allows the radar to be constantly active. This improvement will allow you to see enemies without manually pressing a button.


Objective 6: Scan the infected patient
The infected person is behind glass nearby. Press [C] and aim at it to do an analysis.
Objective 7: Kill the infected patient
Make the patient die by any means necessary. Just make sure he doesn't kill you.
Goal 8: get the infected gland
Approach the zombie and use the syringe to fill it with contents.
Get Doctor "Studium contagione" Dee
Objective 1: reach the transition from the supermarket to the Brick Lane residential area
Head to Brick Lane Market and head towards the supermarket entrance. Opposite is the entrance to a residential area.


Goal 2: get to the basement of Ron Friedman's apartment
Go down the stairs to the basement and go through the hole in the wall. Go outside and climb the boxes to get over the wall. Climb through the hole in the fence. A zombie will fall immediately from above. Go to the door at the end of the corridor and open it with a master key. There you will find a first aid kit, chocolate and a mod. "Improving spread." Come in next door. There you can go out to the other side of the house or go up one floor. At the top, the door will be locked on the other side. Go through the warehouse with the boxes, getting rid of the zombies. Go behind the blue car and climb up through the scaffolding. There will be a hole in the wall. Go down the stairs, look for another staircase and go up. You can get inside the desired room through a hole in the ceiling. There you will find a double-barreled shotgun. Go down to the basement.


Goal 3: get to Ron Friedman's apartment
There will be a fast travel point in the basement. Go further and in the room you will find 2 elevators, of course you can’t do without zombies. Go up to the 4th floor. As soon as you exit the elevator, the doctor will contact us and say that Ron's apartment is located on the floor above. We are looking for a ventilation shaft. Behind the wall the music is playing at full blast. In the room on the right there will be a hatch leading into the mine. Through it we penetrate into the bath. We go out and open the door nearby. The zombies are having a party. Do not turn off the music under any circumstances, this way you can walk past them without disturbing your stuck comrades. Go through the dance floor of the infected and in the next room climb into the mine again. The signal with the doctor is lost. A dead man enters the mine. Quickly crawl towards the exit. Enter the open door of the room. You're at the place.


Objective 4: Take John Dee Stadium
Carefully walk around the boxes. Here you can scan the switchboard to reveal the area on the map. Move the cabinet away from the door and enter. It is better to lock the door behind you, provided that you have boards with you. Go to the table and turn on the lamp. She will show the code to the safe on the table. Enter these numbers on the panel - 1527. Zombies will immediately trample on you. There will be a book and a mod in the safe. "Increasing firepower."


Goal 5: Escape through a garbage chute
Exit through the ventilation in the room and jump into the garbage chute.
Goal 6: give the doctor "Studium contagione"
Return to the doctor the same way and give the book.
Get the doctor 7 letters from Dee
This mission can be completed after completing the mission and receiving new improvements on the life board.
Objective 1: Take Dee's first letter
You will receive the first letter when you bring "Studium contagione" to Dr. Knight. Go to the window. And take the letter.
Goal 2: find email owners using monitors
Return through the shortcut to the Vault. Approach the monitors to activate the mission "Raid on the Military Arsenal".
Objective 3: Get Dee's letter from the Victoria Memorial
Teleport to the Memorial. After stage 4 of the task, go into the armory and pick up the letter from the man’s body.
Objective 4: Take Dee's letter from the Brick Lane residential area
Teleport. Return to the surface to the storage facilities where you were earlier in the mission. stage 2. At the blocked passage, use C4, behind it you will see a zombie sitting on the toilet. You can find the mod here. "Increasing rate of fire." Go to the second floor offices. There is a defective picture on the wall with the door. Go out to the second office and through the window adjust so that the 2 parts connect and you get a single image of a raven. Scan this logo and you will find out the code. There you will find Dee's notes and MP5, a first aid kit, ammo and a mod. "Increasing capacity."
Objective 5: Pick up Dee's letter from Brick Lane Market
Near the distribution block that you scanned in this location at the very beginning there will be a staircase. A little further there will be a pile of garbage. Use C4 to get rid of it. Climb behind the wall and you will find a letter on the corpse.
Objective 6: Take Dee's letter to Spitafields Green
Such doors can only be hacked with the help of the "scan hacker" upgrade, which is given at the end of the task .
In this location, the book is located behind the gate near the iron barricade, which you have already clearly seen while completing the task. Take out the scanner and break open the door. Crawl through the hole in the brick wall. From the other side, take Dee's letters on the corpse.
Objective 7: Take Dee's letter in the Tower
Return to the pier. Go up the stairs and destroy the signal jammer. Because of this, it is impossible to get the scanner. Hack the door and go to the barge. There you will find a book. And also the M4 combat shotgun, mod. "Improving spread."
Objective 8: Take Dee's letter to Baconfields
Find a small shed near the nursery. Break open the door and take the letters. In addition you will find Magnum and mod. "Increasing capacity."
Objective 9: Take Dee's letters to Dr. Knight
Return to the palace dungeons. Place letters in the receiver.
Objective 10: Return to the Retreat Room in the Vault
Raid on a military arsenal
Goal 1: get acquainted with the task
The living one says that a military camp has been set up in the palace. Colonel Waverly is in charge there, he can help with weapons and get C4.
Goal 2: Get to Green Park
Teleport to Victoria Memorial. Dee's crows contact the survivors and talk about the signal to evacuate. The living one warns that this is a trap and they will kill us. In the sewer, exit through the open door. There will be a lot of zombie activity on the street.


Goal 3: Get Colonel Waverly's e-pass
Coming out of the gate, on the right side there will be a tent illuminated with red light. In it, take the pass from the colonel's corpse.
Objective 4: Open the gate of the army arsenal
Return to the gate, but do not rush to enter. There is a passage in the wall on the right. Crawl into it and on the other side you will find a mod in the tire tire. "Increasing rate of fire" and a grenade. Go back and nearby you will find a locked door, near which you already ran.

Objective 5: Rob the army arsenal
Here you will find a lot of useful things. Including mod. "Increasing firepower" and C4.
Give the evacuation signal
A certain Sondra from "Dee's Crows" is evacuating people from the Tower.
Goal 1: Find C4
C4 will be in one of the boxes in the arsenal according to the assignment.


Goal 2: get to the Tower
Come out of the gate again. The girl will provide cover from the bridge, move towards the Tower. You can crawl into the hole or use C4 on the barrier. Go along the pipe and go out the door.
Along the way, Living tells us about Dee's Crows. Climb into the hole in the wall and go up. Overcome the water obstacle and move along the pipe. Here you are on the street. Sondra from the Crows of Dee contacts us and tells us to clear the road to the Tower. They lost their sniper. Take the rifle further on the pier and get down to business. To enter aiming mode, press [RMB+Space]. Kill all the zombies on the barge and move on to the marker. At the next staircase in the distance you will see another group of walkers. If you look closely, you can take them out with one precise shot. One will have a balloon on his back. Hit it and they'll fly off into the air. Have you ever tried dead meat? This is your chance! After shooting, go through the water to them and go into the arch.


Objective 3: Break through the Traitor's Gate
Place C4 on the barrier at the gate and move to a safe distance.
Goal 4: find the secret passage
There will be a zombie inside spitting acid, so immediately shoot it in the head or don't even let him take a hit. You will find the necessary ammunition from him. On the right there will be a door with the entrance to the fast travel location. After going up the stairs, you will find a hatch on the right.


The main gate will be locked, so you need to get inside another way. This path is located to the left of the gate - a passage near which lies a zombie. As soon as you try to crawl through, the ghoul will quickly attack and want to profit. With just one movement you will blow his head off. Go down and you will see a shadow on the wall and eerie sounds. A zombie will run out at you in one of the cells. In the same cell there is a hole into another one, the gates of which are closed. Around the corner where the shadow is, 2 bodies will run out when you get closer. There is a camera distribution block here, which opens the map. Open the cage with a master key and go upstairs. There will be a secret passage behind the wooden door.
Goal 5: find and open the secret passage
Scan the door and it will open.
Objective 6: Find the entrance to the Raven Dee bunker
Climb the stairs and climb into the hatch in the floor. Be careful and watch out for zombies in a gas mask. This is a death row. It will explode when you get close and will remove a good portion of your HP bar. You can find a mod in stock. "Increasing capacity." At the wall you can hear the noise increasing. Shine the scanner on it and a passage will open. An infected person will immediately come out of the water towards you. Get up and go to the door. There will be a hole to the left of it. Slowly crawl inside and go back, there will be a zombie on the way. Retreat to finish him off and clear the way. You will be taken to the hall. New weapons will be available. Take the AK and Molotov cocktail from the safe.


Goal 7: Scan the code on the wall
The tablet will be improved: a new function has been added - a decoder.
Goal 8: Use the code to exit the bunker
Move the closet indoors away from the wall. Scan the hidden image on the wall and you will receive a code.
Goal 9: get to the roof
Climb the stairs to the roof. Run to the door to the tower under the cover of Sondra. She regroups. The dead will run out of the door, finish them off immediately, use the selected AK. Go upstairs and there you will find an exit to the spiral staircase on the tower.

Goal 10: Clear a landing area
Goal 11: get to the helicopter landing site
Ride to the helipad, killing zombies with Sondra's help. Until all of them are killed, the task will not be completed. The helicopter will be attacked by crows and will crash.

Goal 12: return shelter
In the area where you found the secret door, there should be a hatch cover that can be used to quickly travel to the Vault. This will complete the mission.
Refuel the generator
The Vault's generator has run out of fuel. I know the owner of the gas station and he can help.
Objective 1: Reach the entrance to Spitafields Green
Return to the Brick Lane Market location. Go to the place where there was a cluster of dead people at the beginning of the game. Go into the tunnel until you come across a door with a code. Open the scanner and you will see arrows on the walls. Follow them. Decipher the inscription on the wall - 78ХХ. Inside the wooden shed there will be two more numbers - XX46. You will obviously have different numbers. Go down and go through the hole in the door.


Goal 2: get to the gas station
Climb out of the hole, go through the door and then upstairs. Immediately break the jammer as soon as you go out into the park. Someone set traps for the infected. Their location is marked on the mini-map, walk carefully. Walk along the left side of the fence. There will be a distribution block in front. In order to be able to use the scanner, destroy the jammer behind the iron barricade with a firearm (you cannot reach it with any other weapon). You can't go past the gate. Need a pass. Or you can hack it later using a tablet upgrade. Go around the yard, go up the stairs and go into the alley. Go out to the gas station. There is a bunk on the roof of the building with a save point. You can get through the gas station fence from the left side by breaking the door with a master key.


Goal 3: Exchange medicine for fuel
Victram will agree only to exchange fuel for medicine for him, and even then, he will convey this in a very strange way. Complete the task. On the way back, a girl will contact you on the radio and open the task.
Goal 4: Improve your life tablet
Go into the house and take the upgrade on the table on the right.

Goal 5: get to the fuel with the help of a scan hacker
Go outside and approach the locked gate. Use the new upgrade to break open the door. Take the canister, right there you will find Shotgun 870.
Goal 6: Refuel the Generator
Return to the shelter and start the generator. Let there be light.
Find a cure for Victram
Vitram sent to find medicine for him. In return he will give you fuel.
Objective 1: Open passage to Baconfields
Exit through the hole in the fence and go into the alley. There you enter the dungeon.
Goal 2: get to a public nursery
Go across the bridge and enter the nursery building.


Goal 3: find a cure
Make your way through the mess and scattered things to the green door. In the toilets, climb into the ventilation that leads to the hallway. Turn around and remove the board from the door in case of a quick escape. Continue down the corridor until you find a door that needs to be broken open. There will be a ladder behind it. There won't be anything interesting on the second floor, so go straight down. Find a door with an electronic lock. The key is in the room on the left. Go in and you will find antibiotics on the wall. On the way back you will fall down.


Goal 4: Escape from the manger
Move from one door to another. Communication will be interrupted and the screams will intensify. A disappearing zombie will appear. After a few hits he will disappear and then reappear. Hit again. So a few approaches and he will be defeated. Until this moment, it will be impossible to escape from the room.


There is a lock with a code in the room. Pick up a scanner and decipher all the messages in this room. There are 4 of them in total, one number for each. The code appears randomly, so there is no point in telling it. There will be UMP 45 and C4. Go into the laundry room and go to the locked door. Remove the beam. The living one will say that a horde is heading towards the manger. They're right outside the door. Run out onto the stairs. The zombies have already blocked the passage. There is an emergency exit on the floor above. Get out of the building and head towards the marker. Scan the door. It's jammed, wait until the Living One opens it. At this time, fight off the plague. Make the most of it as it will be hot. It is best to climb into the container to rid yourself of being surrounded by infected people. After a couple of moments, run through the open door and follow back to the gas station.

You will find Victram already transformed into an infected one. Don't tear him away from breakfast in the form of a son, but shoot him in the head.
Save the girl
Goal 1: get to St. George's Cathedral
Leave the shelter and go straight. Go down the stairs near the turret and break open the right door.

Objective 2: Break open the door to St. George's Cathedral
Goal 3: find the girl in St. George's Cathedral
Go out to the dungeons of the temple. Go along the sewer. Move the drawer aside. When you go out into the wide corridor, 4 zombies will come out. We recommend using a shotgun in this case. At the end of the corridor there will be a room with a jammer, be careful, because the demolition man is sitting there too. Lure him out, move to the door and kill the asshole when he shows up. Opposite this door there will be a blockage that can be removed with C4. Unfortunately, there will be nothing interesting there.

Go back and break open the door nearby. There will be 3 dead people inside. In the room on the right you could see, still through the window outside, the raven logo that needs to be composed. Go there, stand in the corner to the door and look at the code. Now all that remains is to find the door. She will also be nearby in the first room. There will be a mod behind the door. "Improving spread." By moving the iron box against the wall you can find a passage. There will be a fork inside. If you go right, you will come out to some ruins.


There will be a passage ahead behind the barrels. Looks like some kind of Wolfenstein or Tomb Raider. Walk along the stone platforms to the barrels on the other side. Zombies will fall on it, push them so that they don’t do this or kill you altogether. Go to the platform on the right and go to the barrels at the end. You will exit onto the platform to the left, then quickly run along the poles to the next platform, where the exit is located. There will be zombies spitting acid in this room. Kill them so you can walk across the planks safely, otherwise you may fall when they spit. One way or another you will get to the stairs - the exit to the top. It turned out to be a trap.
Survive in the arena
Goal 1: Pick up an MPA
You wake up in the arena. This is a church converted into an arena. All items were confiscated, but they can be returned if you win.
Take the pistol with ammo from the rack ahead. Let the show begin.


Look around the area. Ammunition should be near an abandoned vehicle, in the trunk, on top of a dumpster, and in a cage. After preparing your equipment, fight off the first wave. There will be three in total.
Lure the zombies to the car that has the gas canister. Make one bang and several corpses. There are also cages that you can run into and lock zombies in them, so they will be trapped and temporarily slowed down.
The next wave is the same + explosive zombie. Blow them up without using the tank, but shoot the demolition man when there are zombies next to him.
The third is similar to the second, only there will be more of them. Lure two zombies to each barrel and you will pass wave 3. The gates open and we go to the bus.

At the gate on the car on the right you can find more cartridges. Behind the bus we pick up a mine and a signal light. On the roof of the bus you can also find cartridges and two more mines. Therefore, quickly collect supplies and go to the arena. Lure zombies into heaps and lead them onto mines. It is especially good if there is one barrel of gas left that you could save. After the waves, you will need to click on the red “Fun” button. Before doing this, place a mine nearby and press the button. The gates will open and more zombies will trample through.


Take the backpack and open the door. There you will find a whole bunch of different things.
Goal 2: escape to the shelter
Follow the exit. It is located to the right of the arena. Pick the lock and get out. Return the same way you came here.
Get Panacea
Objective 1: Meet with the doctor in the Royal Quarter
The doctor will no longer be in the laboratory. Run into the hall with the red floor, where the elevator is located, and go straight through the door. There is security on the door. A retinal scanner is required.
Objective 2: Find the doctor at Buckingham Palace
| Attention! Point of no return! |
Get into the elevator. On the second floor, follow the same path as in the task. There will be several infected along the way. After the hall where everything was on fire before, go up the steps. You'll have to deal with two teleporting zombies and a couple of regular ones. Find the door there, hack it and go downstairs. There you will find a doctor. He turned.


Goal 3: kill the doctor
Goal 4: take the doctor's eye
Objective 5: Return to the Royal Quarter
Kill the doctor and take his eye by pressing [E] often. At the end of the room you will find a door with a code. The code can be found by standing at a certain point and looking at the columns, you will see numbers. Enter them into the panel.

Climb into the ventilation passage, through it you will get to the kitchen. Kill some more walkers. There will be another hole in the kitchen through which you can exit to the fast travel door. Travel back to the royal bunker. The door through the normal passage of the laboratory will be closed, so you will have to go around another way. Climb into the ventilation where a zombie will come out. When you get out into the warehouse with the boxes, go through the maze, crawling under the shelves.


At the door at the end, climb into another passage. When you get out into the toilet, quickly close the door, because there will be a demolitionist there and kill the zombie crawling behind you, then back into the mine, lure out and kill the demolitionist, who will crawl after you. Go up one floor. Go out into the hall with the red floor and use the eye on the scanner.
Goal 6: download the Panacea formula
Follow the flooded corridors. Go around the first blockage through the room on the right, go straight into the room and climb to the ventilation. After leaving it, do not rush to break open the door, because a zombie will crawl out of the same ventilation. After finishing him off, uncover the set of master keys. Go through the iron door of the bunker and activate the computer. During loading, a siren will sound and attract several infected people who will run towards you. You may not take Panacea, but simply leave, then there will be a bad ending.


Goal 7: Get the Panacea formula
Take the formula.
Goal 8: Escape the palace dungeons

Now run as fast as you can. Get down into the flooded room and run to the door. It’s better to close them behind you to delay the flow of the dead. Climb the stairs and run out to the bridge. The doors will close in front of you, run around the tunnel on the left. When you see a closing door with a flag, do not run into it, but immediately turn left. Exit to a hall with a red floor. Come to the surface.
Unloading
Goal 1: pick up equipment from the chest in the Vault
Sondra announces that there is a last chance to evacuate. This area will be considered closed and will be bombed. The place of evacuation is the same Tower. Return to the shelter on foot and pick up everything you need.

Goal 2: escape from the shelter
Leave the room and go down the stairs behind the gate. Fight your way through the zombies and open the door nearby, which will lead to the Tower. A cutscene with Living will start.
Evacuation from the roof of the Tower
Goal 1: get to the Tower
Go through the metal doors. Go through the water and run through the pipe outside. Run across the first pier, then the second. There will be a Demoman at the end of it, so be careful not to hit him. Swim across to the arch, run through the gate and head towards the tower, ignoring the zombies.
Tell your friends about the games!
What are they, computer zombies?
First of all, each of the games is colorful and well thought out, because ultimately the developers' task was to attract players, and not scare them half to death. It should be noted that the creators of computer games performed this task perfectly, as evidenced by the variety of proposals of this kind. In some of them you need to save your own skin, in some, on the contrary, you need to confront living corpses with the habits of cannibals, in any case you need to be active and, of course, do not forget that these are just games.
You may not believe this, but in the ranks of computer zombies you will find not only soulless monsters who want to replenish their own ranks at the expense of the players, but also unfortunate downtrodden characters whom you can mock to your heart's content. At the same time, there are plenty of ways to turn any zombie into a pile of bones; you just need to use your brains and use some well-known information. For example, if you try to shoot at a zombie with a regular bow or pistol, there will be no harm to it, but if you shoot down a heavy box or activate any other mechanism, which then falls on a group of walking skeletons, then the effect will be correct. The whole company will crumble to pieces, scatter ashes throughout the world and will no longer annoy anyone with its presence.
Plants are also very effective in fighting zombies. It may be unknown to some, but in a number of games these representatives of the other world are afraid of exposure to light, which means that you can shoot at them with light weapons and quite successfully. Since walking corpses do not differ in mental abilities, they simply do not know how to get around obstacles, so it will not cost savvy gamers anything to fool them.
There are also games about zombies, where the living dead themselves have to escape from persecution. But there are quite a few of them, mostly the opposite is true. After all, everyone knows the simple truth: if you spare at least one zombie, even the cutest one, then a new invasion is guaranteed, and then the apocalypse is not far away.
Fight the living dead
There are simply no boring games about zombies, but there are plenty of interesting ones. Numerous sea adventures are not complete without the participation of the living dead, because it is the dead who often guard once-looted treasures; numerous legends are associated with their stay at sea, and they are so interesting and unusual that they even take your breath away. That's why even in match-3 games with a treasure hunt theme, you can see amazing skeleton dances.
What then can we say about colorful platformers, adventure games, shooters, strategies or quests, take my word for it, they are all very interesting, and even better, try playing it yourself to see for yourself. The favorite place of zombies, of course, is cemeteries, which is where it is better not to go at night. Such places are not for timid people, because not only will the standing corpses need to be repulsed here, but also to fight off bats, and not to be afraid of night birds.
In games for two
Online zombie games are not only for one person, but also for two. This is where it gets really interesting! It would seem like a classic plot, but how much adrenaline can you get? The beauty of games for two players with such a plot is that you can try yourself not only in the role of civilians or adventurers ready to fight zombies, but also in the role of the living dead themselves.

Screenshot from Left 4 Dead 2, by Valve Corporation.
In addition, you can eradicate evil as a couple, the most important thing is not to drift away, because otherwise a zombie apocalypse is guaranteed. It is possible to save civilization from the cannibalistic dead, but you need to try hard to do this, because one bite from these monsters is enough for a person to become a fresh addition to the ranks of soulless cannon fodder, constantly hungry for satiation.
You may not believe it, but in the company of zombies you can even take part in races, but these races are very unique and spectacular. Don’t be surprised if you witness the pilot of a neighboring car’s arm or leg fall off; such a driver’s head can easily fly to the side, but the car will continue to drive at this time, so think for yourself whether to get behind the wheel of the car next to you or to refrain from similar risk.
In general, a lot of interesting offers await all gamers who don’t mind spending time in the company of the living dead. Don't forget that even during a virtual game you can get plenty of adrenaline. Have an interesting time!
Fans of computer games in the "survival" genre have probably long noticed a zombie horror game from Ubisoft called ZombiU. However, not everyone could try to survive in a world filled with the walking dead: the game was originally created exclusively for Wii U.
However, recently, PC users can also try their hand at ZombiU, because... The game developers decided to expand their “zone of influence.”
This article will help players complete ZombiU with the least difficulty, tell you about the main tasks and how to avoid traps and solve puzzles in a post-apocalyptic world where chaos and death reign. In general, we present to your attention walkthrough of the game Zombie- in text form, as well as in video form... If you don’t want to read, you can just watch.
Brief description of the game process
The main character begins his journey in London. When he wakes up, he realizes that all the people around have become the living dead, whose goal is to catch and kill the survivors. The main thing to do is to follow the instructions of the voice, which will tell you how to escape.Run away from the infected
Climbing up the stairs, you can catch your breath - zombies don’t know how to climb. A voice will instruct you on how to use the flashlight (F) and fight off enemies. The mission will end when the hero runs through the indicated door, finding himself in a safe shelter.Find the deceased predecessor and pick up the MOR backpack
Initial mission to the shelter. The hero meets Living - a mysterious voice who tells his story. It teaches the player various skills and gives them things necessary for survival. To pick up the MOP backpack, you need to find and neutralize its less successful predecessor. The backpack will also contain a diary, which you should read carefully, thereby increasing your own chances of survival.Find and scan two broken chamber distribution blocks
This is necessary so that Living can provide a more detailed picture of the area. Fearing zombies and following the directions of the Living One and the marks on the mini-map, find two distribution blocks - on Brick Lane and in the supermarket. Find "Increased rate of fire" bonuses and flash grenades.In parallel with this, the hero should find a shortcut to the shelter, which can now be used.
Repel a zombie attack
After the Living One tells you about the chest in which you can store the things you found, you will need to defend against two waves of attacks by the dead on the shelter.Get to the Buckingham Palace bunker
The next task within walkthroughs of the game Zombie there will be an infiltration of the Royal Palace. Having taken a personal pass, you need to get to the center of London and, after scanning the next distribution block of the camera, get inside. In the container next to the palace you can find a mod to increase firepower. Along the way, you will have to shoot a crowd of zombies from a turret and open a chest with useful supplies. The collector can be used to reach the bunker.Rob the Queen's bunker
After going down, the connection with the Living disappears. Behind one of the doors you will hear the voice of a survivor - Doctor Peter Knight. He will ask you to bring him a book, which is what you need to do. Along the way you will meet a new type of zombie - spitters, which have a long-range attack. You need to be careful with them.While searching for a doctor's book, you can find 2 additional backpack slots. When the task is completed, Knight will tell you about Virucide, a drug that can neutralize the infected. The syringe with Virucide is disposable; to use it again, you need to get the drug from the gland of some undead. The Doctor gives instructions on how to use this new ability.
Get the book "Studium contagione" for the doctor
Peter Knight asks for another book. Having made his way to a residential area, finding the "Scatter Improvement" modification and opening the safe in Ron Friedman's apartment (combination 1527), the hero will find the desired publication and increase his firepower there thanks to the corresponding bonus.Attention! From this moment on, quests in the game cease to be linear. They need to be completed simultaneously, because... all actions are interconnected and one cannot be completed without the other.
Bring all seven of Dee's letters to the doctor
- The hero receives the first letter for completing the previous mission.
- Next, you should head to the shelter, where you can find out the location of other letters and unlock the mission “Raid on the Military Arsenal”. By using the teleporter to find yourself in the Victoria Memorial, you can find one of Dee's letters. In addition, you will have to rob a military warehouse and get a lot of useful things, for example, several bonuses and C4 explosives.
- The third letter will be found in the Brick Lane residential area, where you have already been. The explosives found in the previous location will come in handy here. The hero will also receive several bonuses along the way.
- Behind the wall, not far from the first switched on switchboard of the cells on Brick Lane, there will be a corpse with Dee's fourth letter.
- You can get the fifth letter only after completing the quest “Refill the Generator”, which can be taken from the Living One in the shelter. An improved scanner will help you break into the door and get the letter.
- In order to receive the sixth letter, you will need to make your way to the pier. On the barge, which can be reached using a scanner, the hero will find a book with a letter, as well as a weapon and the “Scatter Improvement” upgrade.
- Dee's last, seventh letter will be found in a small shed not far from the nursery.
The letters need to be placed in the doctor's reception room in the dungeons of Buckingham Palace, and then return to the shelter and sleep off.
Give the evacuation signal to Zombie
It becomes known that the stranger Sondra, a member of the Crows of Dee association, which the Living One will talk about, has planned the evacuation of survivors from the Tower. Helping Sondra cope with various Zombies, you need to get into the Raven Dee bunker. There you can get the “decoder” function on your life tablet, which will subsequently help you get out of the bunker.Unfortunately, despite all efforts, the rescue helicopter crashes. By using the fast travel portal to the shelter, you need to complete the mission.
Refuel the generator
As already mentioned, this task gives access to improving the tablet. In addition, as the quest progresses, the hero will unlock two more tasks - “Find a cure for Victram” and “Save the girl”. The first task is quite simple to complete by following the directions and checking the mini-map, but the second will lead the player straight to the arena.Survive in the arena
You will need to defeat three waves of zombies. If you are defeated in the arena, then you can say goodbye to the entire contents of the backpack, so victory is in the interests of the hero. When it's all over, you need to grab your backpack and all sorts of useful things and quickly head to the shelter.Get Panacea
It's time to get a cure for the zombie virus, which the doctor is developing. To do this, you need to kill Peter Knight himself, who, unfortunately, was already infected. You need to download the Panacea formula from the computer in the bunker of the Royal Palace. You don’t have to take Panacea, but then the ending of the story won’t be very good. You need to run back to the shelter very quickly, since a whole crowd of zombies will chase the hero.Successfully evacuate from the roof of the Tower in Zombie
Sondra announces one last attempt at evacuation. It means that Zombie walkthrough is coming to its logical conclusion... It is necessary to take the necessary things to the shelter. The living one perceives the situation very negatively, he is aggressive and drives the hero away, remaining in the shelter himself.Having reached the Tower, you need to pass hordes of zombies in order to eventually get to the roof, and from it to the rescue helicopter. Game over!
A small summary!
Depending on the player's actions, the ending can be of three types: good (development of a vaccine from Panacea), bad (the hero survives, but there is no vaccine), and very bad (death on the way to the helicopter).What could be more terrible than a deadly virus that has infected all of humanity and bloodthirsty dead people walking freely through the streets?! Zombie games will take you to the bloody and threatening world of the Apocalypse, in which you will have to survive at any cost and fight maddened monsters in all available ways.
Games about zombies are created for those who like to tickle their nerves and add a little adrenaline to their lives. As a rule, the main idea of the game is always the same: after a global environmental disaster, humanity perishes in terrible agony, and, under the influence of a virus, turns en masse into wild and uncontrollable mutants. Their goal is to destroy all living things, but a bunch of randomly surviving daredevils challenge the living corpses and begin to destroy them by all available means.
Zombie games will delight you with a dark and gloomy atmosphere, ominous music and unique missions with different degrees of difficulty. You will have to move a lot, run fast, shoot accurately, use voodoo magic and adhere to tactics that will help cause maximum damage to your enemies. Playing zombies, you can have great fun and challenge the creatures of the Apocalypse.
Successful Walkthrough of "Zombie Farm" impossible without knowing the game's secrets and nuances. To achieve your main goal - to become a person, you need to work hard and hard.
Buildings in "Zombie Farm" on Android
To increase levels in this game project, you need to gain a certain amount of gaming experience. An important place in gaining the necessary experience is given to various buildings.
Crypt- one of the most important buildings, the construction of which is necessary first. This is a production site for pipes that are needed for the construction of new buildings. The crypt also provides for the production of green paint.
Lighthouse- a place for the production of wire and red paint, which you will need a little later.
Pyramid- place of production of nails. Nails are created from wire and gear.
Very sharp eye- construction is only available when the average level is reached. However, during digging you will come across rare things, which can then be exchanged for sheets of gold and yellow paint. Super shovels are produced here, the materials of which are coins, bamboo, boards and nails. (Construction of such buildings is available upon reaching game level 23).
Business center can be built upon reaching level 28. Here you can sell inexpensive plants for quite a lot of money. The funds received can be spent on purchasing decorations, increasing the territory of your farm and hiring a crew.
Lock- the next building for which you will need a lot of space, so you should take care of this in advance. It provides for the production of springs and colonnades, which are needed in further construction.
Tower- one of the most complex buildings on the Zombie Farm. But all the costs of its construction quickly pay off. After all, the production of most materials is possible here.
How to prepare for completing quests
Before you start completing quest tasks, you should first prepare for them. By preparing for them, you can significantly reduce the time spent on completing them.
Harvest quests
The task of some quests is to harvest the harvest, and you can plant it earlier. There are also quests for planting crops. If you no longer have any space left for garden beds, then plant the seeds you need, remove the beds and replant the seeds. To complete the quest it is not at all necessary to wait for the crop to grow. If a quest requires you to sell a crop, but you don’t have one, you can receive it as a gift from friends and then sell it. In the same way, you can give a harvest, having previously received it from friends as a gift.
Quests with cooking recipes
If the quest task says to brew a lot of potion, then in this case it would be advisable to use “salt” or “iodized salt”. It will also be very useful for you if you don’t miss a quest like “A minute for 2 days” and receive a reward for completing them. Having completed the task of such a quest, you will be able to cook any recipe in one minute for two days.
To complete a quest to cook a complex recipe, such as Zombium, it is best to prepare all the necessary recipe ingredients in advance. If there is a shortage of harvest, when you urgently need to cook a recipe, there is also a way out. To do this, use the “tree of love” tape measure. If you only need a small amount of the missing item, you can grow it using “plant fertilizers.” They are provided in 30, 50 and 100%. For the production of such fertilizers, special buildings are provided, for example, a “zombie box”.
Item Search Quests
If the quest task says to find an element of some collection or material. In this case, execution is possible in three options: find, dig, or receive from a friend. Often only one option out of three proposed is suitable. If a task requires “material,” then most likely it will need to be obtained from a friend or created in a special building. There are more chances to dig up a collection item from your neighbor's farm. But at the same time, if digging works, then finding will work. Searches can be in: a suitcase, a chest, a treasure hunter's bag, Easter eggs, a fisherman's bucket, as well as in various gift sets.
Collection exchange quests
Most often, the quest task is to exchange several collections. Usually these are collections of a certain type in the amount of 10-15. So that such quests do not take you by surprise, as you progress through the game, try to collect collections when they first appear. You must have at least 50 collections of each type in stock.

Zombium
The most important recipe in the entire game project is “Zombium”. To cook it, you will need three sleepy sundews and two wolves, as well as four hours of time. By selling it, you can get 185,800 coins. There is only one way to get Zombie.
Used in the process of a zombie becoming a human in the Mayan pyramid. For this transformation you will still need 99 peace. Also, “Zombium” is indispensable in reviving love in the Altar in Khrustalny for the task “Awakening”. In addition to “Zombium”, you will also need “Your Love”, which can be obtained by completing the task “Excitement” (here you will have to brew “Zombium”). This magic potion must be brewed to get the “Human” achievement and one zombiebuck to boot.
Coins
One of the types of game currency. With its help, you can purchase the most necessary and regular items on the market, for example, decorations, zombies, seeds and many others.
You can earn coins while completing most quests, selling items from your warehouse, digging up beds, and exchanging some collections. You can also get coins in the roulette of different buildings, when you reach a new level, by opening chests and other surprises and, of course, purchase them for real money.
Coins are used to create zombies in Babylon, as well as some materials, in the construction of some of the buildings, to purchase items on the market (this includes seeds for planting). To open the Over the Fence expansion you will also need coins.
Zombaxes
A type of game currency, it is necessary to purchase the most valuable and exclusive items on the market, for example, decorations, brains for rent, buildings, zombies with brains and many others. This currency is quite rare, so you should treat it very carefully and not spend it unless absolutely necessary.
You can earn zombies by completing tasks or you can create them yourself in Babylon (you will also need zombies). When you reach a new level, you receive one zombie. By playing for chips in bonus roulettes in Rocket, Mill, Golden Skull, Zombie Vertical, you have a chance to also get Zombucks. There is also a chance to get Zombucks when opening some gifts and eggs that fall out of the holiday roulette. They can also be purchased with real money, just like coins.
You will have to use zombies when purchasing items on the market or quickly purchasing some of the materials in the building construction menu. With Zombucks, you can prematurely unlock items that are unavailable for your level, as well as unlock the On the Mountain expansion. Also, with this currency you can enable auto mode for stonemasons and woodcutters.

Zombie workers
This kind of zombie does all the work for you on the site. To purchase these zombies, you need to visit the market. Initially you have several zombies: a woodcutter, a cook and a stonecutter. Zombies can also be used to complete quests.
Previously, all zombies required brains, but today, thanks to the development of this game project, zombies have appeared that do not require brains. But the cost of such zombies is quite high.
You can move and place all your workers on any island. Just remember that there are islands in the game where it is impossible to use workers, for example, Cherry Island. However, to complete the dungeons, the developers specially created a corresponding Elvis brigade. If you place your zombie workers in a warehouse, they are automatically moved to the "Dump" section.
For most zombies, it is possible to increase the speed of work. For this purpose, special boosters are provided, one of them is the “Super Production” bonus. Thanks to this bonus, woodcutters and stonecutters mine one unit per minute. An automatic mode is also provided for stonemasons and woodcutters. Its cost is 30 zombies. In auto mode, zombies work constantly, you don’t even collect mined materials from them. This opportunity is not provided for other workers.
Brain
Almost the most important object in Zombie Farm is the brain. They are necessary for every zombie, including you and your friends. Initially you have three brains between you and your two workers.
Getting brains is not that easy. They cannot be dug up on friends' estates and cannot be obtained for collections.
Methods for obtaining brains:
- bury friends (maximum two);
- purchase for rent;
- rent it as a gift from the administration.

Ritual "Becoming Human"
The most important ritual that every zombie strives to perform. It takes place in a Mayan pyramid and turns zombies into humans. To carry out the ritual, it is necessary to build the Mayan pyramid itself, which can only be accessed from the “island of love”, prepare the “Zombium” itself and have 99 worlds (free gifts). This ritual can only be performed once. Carrying out the ritual a second time is impossible. You can't turn back into a zombie either.
Important: until now, many players believed that this was the main goal of the game. but this is far from the case. After turning a zombie into a human, new adventures begin.
The performed ritual gives the following things:
- the opportunity to make brains in Ostankino and Svoboda;
- no one can bury you anymore;
- one brain is freed, because the main zombie no longer needs it;
- your avatar will be framed in a gold frame with the inscription “Human”, which your friends can see.
There will be no external changes to your zombie.
Level and Ritual
In order to prepare zombies, almost all plants are used, access to which opens up to level 50 inclusive. Therefore, without the help of friends and zombies, you can only turn into a human no earlier than level 50. Just don’t think that with friends you can turn into a human from level 1. After all, by discovering islands and building a Mayan pyramid, you gain the necessary experience, which means you will still have to advance through the levels.
Video resources for completing the game “Zombie Farm”
Zombie Farm on Android - difference from the game on VK
Completing the Indesit quest series


